Thursday 6 May 2010
Evaluation
when we were set the task of animating a aesop's fable i knew it was going to be something which i would enjoy doing and would take a lot of time to complete. The module started off really well and i soon began making mood boards for the two crab fable and generating ideas and the style i would like to make my two crabs in. it was nice to be able to make cartoon 3d characters rather then life like models in the first semester because this is something which really appealed to me. once i started making the models and environment thats when i realised i still had some way to go in completing the project but was very interesting work. The camera views and rendering process was all very new to me and to be honest the most enjoyable part of it all was making the camera shots of the final renders. not only have i produced a nice 3d animation but i've improved my skills with studio max a considerable amount and now feel a lot more confident going into the final year using it. I know we have two more 3d modules next year so that will be very interesting to see what i produce for them. although i have succesfully completed the task of the module but i do feel there is improvements to be made on the animation like putting more time into the animating and actually getting over some of the problems i encountered. e.g. like the fact that i couldn't rotate the eyes from the centre point, every time i tried to fix the pivot on the centre it wouldn't work so when i pressed the auto key to animate the rotation point was in the wrong place, so i was forced not to use the eyes which really annoyed me. also i had many problems with my copy of the software when rendering as it keep crashing which made me lose massive amounts of time. i think if i was to do this module again i would do it on the uni computers as they are much more powerful and will handle the programme better and are more reliable. Saying that the module was really enjoyable and am looking forward to more 3D work next year.
Final touches

After completing the sound track the only thing left for me to do was to complete the subtitles or characters speech. i was going to record my own voice but when i fort about it i didn't like the idea and decided to use subtitles at the bottom of the animation which i think work well and help explain the fable much better. this is actually a very simple attribute of i movie, you simply selected the type of text and border you want and drag and drop over the scenes you want text on and simply define how long you want the text to last on each scene for. i think it looks good and ties in well with the animation so i am pleased with the over all finished animation.
Editing (Finishing touches with flash)

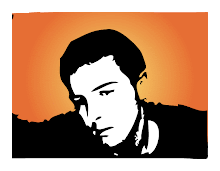
After i had finished the audio i then decided that i wanted to make the intro and outro a lil different buy using a couple of flash animations i made specially for this project. the first was the intro which you can see above, a fairly simple flash animation but works really well in the finished version of the animation.
- i simply created the background and two crab characters in photoshop and flash. then converted the two crabs into symbols and applied motion tween to give them the bouncing motion with a few keyframes after each, using the scale tool to give them the effect of squashing a little bit when landing. i then repeated this process for the end credits, suing the same animation but adding my SID number and the moral of the movie" example is better then precept"
- then adding a simple circle shadow to give them a better look. converting the shadow to a symbol and using a motion tween to scale big and small depending on where the crab is in the air.
- then gave the text a glow to make it stand out a lil more against the background.
Editing (Sound edit in logic pro 8)

Once the film was edited i then began adding a soundtrack to my Animation. i needed something happy and up neat to accompany the animation as i was going to be used sub titles on the final version so didn't have to worry about sound effects and voices. i used logic pro because i use it a lot to produce my own electronic music and know the interface very well( to well in-fact). i used the libraries in it to find a piece of music it was called "Road trip" it ust seemed to go really well with the feel and mood of the animation so i used it.
Tech info
- created a audio track in logic and imported the song into the audio track (drag and drop in).
- then cut the track to fit the time of my animation about a minute i think buy using the cut tool to discard the unwanted audio.
- i then applied a volume automation which can higher or lower the volume on a line scale much like 3ds max's modify morpher. i did this at the begin and end to fade in and out the audio for the animation.
- then exported the file and dropped it into imovie behind the animation.
Editing

To edit my animation i used imovie i know he said to use (premiere pro) but my files i exported in quicktime where really good quality and all the other file types i exported look really bad compared to MOV files. ( plus couldn't get premiere pro to use quicktime files which is really weird). Im quite familiar with this software as i've used it to make stuff for youtube and other media things before. Once i had imported all the camera shots into imovie i then began the task of editing and cutting scenes together, much like premiere pro i used the cut and scrape tool to edit clip length and sorted them into the appropriate order i wanted them in. once this had been completed i went over the finished edited film just make sure i was happy with it and that nothing was out of place.
Lights, Camera, action...... Render :(
After i had completed all the camera angles, lighting and animation it was time to get rendering each of the camera shots. this took quite some time as i have been doing it on my laptop, and which would have probably taken half the time on the monster macs at uni. i render off each camera angle separately.
- render setup and choose to export in (MOV quicktime) and choose uncompressed because it was the best quality, but took a lot longer to render, was well worth the wait though.
- then i just selected the frames to render e.g. 100 - 250 and kept doing that for each camera scene 13 in total.
After i had all the frames render to my desktop which all in all probably took about 6 hours, it was time to begin the mighty task of editing it and trying to make it make sense. :S
Lighting

I tried a few different types of lighting for this animation but the one that i went with was the simple omni spot. i tried to set it up so that it gave the impression of sunlight, i realise that you can use a skylight to try and imitate natural light but it made the animation look very faded and dull which wasn't particularly nice. i like the way the omni gives a good depth to the scenery and the characters and really finished off the animation nicely. i must admit i don't know why the shadows are sometimes blocky and sometimes smooth but im sure richard will enligthen me lol.
Subscribe to:
Posts (Atom)